
Last updated November 18, 2026








Free written scope consultation - allowances, timeline, and change-order rules on paper before a single trade is scheduled
Home Remodeling Maintenance Schedule: What to Do and When
Most homeowners open their maintenance checklist only after something fails. The grout cracks, the cabinet door sags, the caulk behind the tub turns black, and now it’s a repair instead of a routine. But a freshly grouted tile floor, a new cabinet hinge, or a just-installed countertop has a specific break-in window, usually 30 to 90 days after install, where small adjustments prevent expensive repairs. In our experience across Garland, the homes that hold up best aren’t the ones that cost the most to remodel. They’re the ones where somebody paid attention during that first season. This guide gives you the exact timing: what to check at 30 days, what to check at one year, and what belongs on a seasonal calendar for the systems that were there before the remodel started. It also draws a line that most guides blur: what your contractor’s guarantee covers versus what your own maintenance is supposed to catch, because confusing the two is how homeowners end up paying twice.
Quick Answer
A home remodeling maintenance schedule has two tracks. Newly remodeled surfaces and fixtures need a 30-day check, a 90-day adjustment, and a one-year sealing and inspection, while existing home systems like exterior caulk, HVAC, and foundation-adjacent tile follow a seasonal cadence tied to North Texas heat and clay soil. Skipping the 30- to 90-day window is the single most common reason a small, cheap adjustment turns into a warranty dispute or a repair bill.
Styles & brands we work with
- Kitchen remodeling
- Bathroom remodeling
- Home additions & ADU
- Roofing
- Windows & doors
- Driveway & pavers
- Fence
Table of Contents
- The Two Tracks: New Remodel vs. Existing Systems
- The First 90 Days: Your Post-Remodel Break-In Window
- Why Garland’s Climate Changes the Schedule
- Your 365-Day Guarantee vs. Your Maintenance Duties
- Kitchen and Bath: What to Check and When
- Flooring and Grout: The Annual Reseal Rule
- Exterior and Windows: The Seasonal Calendar
- Printable Month-by-Month Schedule
The Two Tracks: New Remodel vs. Existing Systems
The first thing to sort out is which calendar applies to which part of your home. A remodeled bathroom and the original water heater don’t follow the same rhythm, and treating them the same is how maintenance gets skipped.
New remodel work follows a short, intense schedule. Materials are still settling, caulk is still curing, and cabinet and door hardware is still finding its true position. That’s why the 30-, 90-, and 365-day checkpoints exist. Existing home systems are different: they’ve already settled, so they follow the seasons instead.
- New remodel (30/90/365 days): cabinet hinges and drawer glides, grout and caulk lines, countertop seams, shower and tub surrounds, tile transitions, new window seals, and any freshly painted trim.
- Existing systems (seasonal): exterior caulk and weatherstripping, gutters and drainage, HVAC filters and condensate lines, water heater flush, and the soil-to-slab edges around foundation-adjacent tile.
Here in Garland, the mix matters. Many homes in neighborhoods like Oakridge and Buckingham date to the 1970s and 1980s, so a kitchen or bath remodel often sits on top of plumbing and framing that’s decades old. The new work needs its break-in checks; the old systems around it need their seasonal ones. A general contractor in Garland can tell you which of your systems are new, which are original, and where the two intersect, so your calendar reflects your actual house rather than a generic template.
The First 90 Days: Your Post-Remodel Break-In Window
The first 90 days after a remodel are when most small issues surface, and almost all of them are cheap to fix if you catch them early. Here’s the sequence we walk homeowners through.
- Day 1 to 7: Open and close every cabinet and drawer a dozen times. Note any that rub or stick. Check that all doors latch cleanly. Don’t adjust hinges yourself yet; just keep a list.
- Day 14: Look closely at grout lines in the shower and around the tub. Any hairline cracks at corners are normal settling and should be noted, not ignored.
- Day 30: Full walkthrough. Test every fixture for drips, every drain for slow flow, and every caulk joint for separation. This is the checkpoint where a contractor should come back and adjust hardware and re-caulk anything that’s pulled away.
- Day 60: Check cabinet hardware screws for loosening, look at countertop seams for separation, and inspect the seal around any new window.
- Day 90: Confirm that door alignment, drawer glides, and tile transitions are still true. Anything that moved in the first three months has settled and should be corrected now.
Miss that 30-day window and small adjustments become bigger repairs. A drawer glide that’s off by a millimeter in week one will wear its track by month six. A caulk line that separates at the tub edge lets water behind the surround, and that’s a repair measured in hundreds of dollars, not a five-minute touch-up. If you’ve just finished a bathroom remodeling in Garland project, this window matters most, because a bathroom concentrates moisture in the tightest space in the house.
Why Garland’s Climate Changes the Schedule
National maintenance guides are written for an average climate that doesn’t exist here. Garland summers push past 100°F for weeks, and the soil under much of the city is expansive clay that swells when it’s wet and shrinks when it’s dry. Both facts change when you should do certain tasks and how often.
- Caulk fails faster. Exterior and tub-edge caulk expands and contracts through our temperature swings, so resealing happens on the shorter end of the range, not the longer one. Where a national guide says every two years, plan on every year.
- Grout and sealant dry out. Summer heat and low indoor humidity in air-conditioned homes pull moisture from grout, which is one reason annual grout sealing isn’t optional here.
- Clay soil moves foundation-adjacent tile. Tile set at the perimeter of a slab, especially in laundry rooms and hall baths, is where you’ll see the first cracked grout in a dry summer. Cracks there are often soil movement, not bad installation.
- Winter freezes are brief but real. The handful of hard freezes Garland gets each year are enough to split an unprotected hose bib or a poorly insulated exterior line. Fall is when you check.
What does this mean in practice? In Garland, the fall is the season to re-caulk exterior joints and check window seals, the spring is for grout sealing and drainage checks before the rainy stretch, and midsummer is for inspecting anything that touches the slab. A Penhallow Remodeling Garland home page won’t substitute for a calendar, but it’s a good place to start when you’re deciding what to fix and in what order.
Your 365-Day Guarantee vs. Your Maintenance Duties
This is the section that saves people the most money, so read it twice. A contractor guarantee and homeowner maintenance cover different things, and mixing them up goes wrong in both directions: homeowners pay for repairs the guarantee should cover, or they file a claim that maintenance was supposed to prevent.
Under the Kingswell Guarantee and our 365-Day Done Right Promise, if the work we did fails within the guarantee period, we come back and fix it at no charge. That covers installation defects: a cabinet door that warps, a drawer glide that fails, a tile that lifts because the substrate wasn’t set right, a countertop seam that separates under normal use. It’s backed in writing on every project, and there’s a free return visit if a repair fails, no service call and no re-inspection fee.
What the guarantee does not cover is damage that routine maintenance is supposed to prevent. Standing water left on grout, caulk that was never resealed and let moisture behind tile, a slow leak you noticed and didn’t address, or a cabinet run that was never adjusted at 30 days. Those are wear and tear, not installation failure.
Here’s the practical takeaway: document your maintenance. Keep a simple note of when you resealed grout, when you re-caulked, and when you did your 30- and 90-day walkthroughs. If a claim ever comes up, that record shows the failure came from the work, not from neglect, and the conversation stays simple. When it’s a defect, a live person answers the phone and we handle it.
Kitchen and Bath: What to Check and When
Kitchen and bath are where most of a remodel budget lives, so they deserve the tightest schedule. Here’s what to check, by timing.
Kitchen
- 30 days: Open and adjust every cabinet and drawer. Check countertop seams for separation. Confirm the faucet and drain have no drips.
- 90 days: Re-check hardware screws. Look at the caulk line where the countertop meets the backsplash, and re-caulk if it’s pulled away.
- Annually: Reseal any natural stone or quartz perimeter, check the cabinet finish for wear near handles, and clean out under-sink cabinets to spot slow leaks early.
If your kitchen was done with a quality cabinet line, the cabinet itself will outlast the finish and hardware if you keep the hardware snug. When we install KraftMaid and Wellborn cabinetry, the cabinets carry their own manufacturer warranties alongside ours, and those warranties typically require normal care and hardware adjustment to stay valid. If you’re planning a kitchen remodeling in Garland project, that layered protection is worth understanding before you sign anything.
Bathroom
- 30 days: Inspect every caulk joint around the tub, shower, and sink. Note any separation for re-caulking.
- 90 days: Check the shower floor grout for hairline cracks and the drain for slow flow. Run the exhaust fan and confirm it’s moving air.
- Annually: Reseal grout, re-caulk tub and shower edges, and check the supply lines under the sink.
Keep the bathroom exhaust fan running for 20 to 30 minutes after a shower. It’s the cheapest moisture control you’ll ever install, and it’s the single best way to extend the life of both grout and paint.
Flooring and Grout: The Annual Reseal Rule
Grout sealing is the maintenance task most often skipped, and the one most likely to determine whether a tile warranty stays valid. Many tile and grout manufacturers require annual sealing to honor their coverage, and that’s a requirement homeowners inherit, not the contractor. Skip it and you may be on your own for a repair the seal would have prevented.
Here’s the cadence for tile and flooring:
- Month 1: Note any grout cracks at corners and around the perimeter. These are often normal settling and should be watched, not immediately patched.
- Month 12: Reseal grout in wet areas (bathroom floors, shower walls and floors) and in high-traffic entries. In Garland, where dry summers pull moisture from grout, this isn’t a task to defer.
- Each year after: Reseal wet areas annually and high-traffic floors every 12 to 18 months. Test with a water droplet: if it soaks in rather than beading, it’s time to reseal.
- After a hard freeze or a dry spell: Walk the perimeter of tile set against exterior walls and note any new cracks. Clay soil movement shows up here first.
For luxury vinyl and hardwood, the schedule shifts to cleaning and humidity control rather than sealing: keep indoor humidity steady, use furniture pads, and address spills quickly. For any tile that spans a crack in the slab, no seal will stop movement, so a crack there is a call-the-contractor item, not a maintenance one.
Exterior and Windows: The Seasonal Calendar
Exterior maintenance protects the remodel from the outside in, and it’s where the seasonal calendar does most of its work. Fiber cement siding, windows, and caulk joints all take the brunt of a Texas summer and a few hard freezes.
- Spring (before the rainy stretch): Walk the exterior and check every window and door seal. Reseal any caulk joint that’s cracked or pulling away. Clean gutters and confirm drainage carries water away from the slab.
- Summer: Check the seal around any glass and the exterior of frames for heat-related cracking. This is a good time to inspect the caulk joints on exterior trim.
- Fall (before the first freeze): Re-caulk exterior joints one more time, insulate or cover hose bibs, and check window weatherstripping for gaps.
- Winter: After any hard freeze, look for new cracks in exterior caulk and any signs of moisture at window frames.
When windows are part of a remodel, manufacturers like CWS and ES Windows specify periodic seal and hardware checks, and skipping them can affect the window warranty. If you’re replacing windows as part of a larger project, ask the installer to walk you through the seal points and what to check each season before they leave. James Hardie siding carries its own maintenance expectations as well, so a written schedule from your contractor is worth asking for.
Printable Month-by-Month Schedule
Here’s the calendar we hand homeowners across Garland, Austin, and the mid-size suburbs our neighbors in. Save it, print it, put it on the fridge. Each month has one or two small tasks, and none of them take more than an afternoon.
- January: After any freeze, check exterior caulk and hose bibs. Note any new cracks in perimeter grout.
- February: Inspect bathroom exhaust fan and clean the grille. Check under-sink supply lines for drips.
- March: Spring window and door seal walkthrough. Reseal any cracked exterior caulk. Clean gutters.
- April: Reseal grout in wet areas before humid months arrive. Check shower and tub caulk.
- May: Check kitchen cabinet hardware screws and drawer glides. Address any slow leaks under sinks.
- June: Inspect window seals for heat cracking. Note any tile movement against exterior walls.
- July: Post-summer check on caulk and grout in the hottest rooms. Confirm HVAC condensate line is draining.
- August: Deep-clean under-sink cabinets and check for moisture. Note any countertop seam separation.
- September: Fall exterior caulk walkthrough before the first freeze. Reseal any joints that pulled away.
- October: Insulate or cover hose bibs and exterior lines. Check window weatherstripping.
- November: Reseal grout in high-traffic areas. Check cabinet and door hardware one last time before the holidays.
- December: Year-end walkthrough: note anything that moved, cracked, or loosened, and plan the fixes for spring.
Common Mistakes to Avoid
- Skipping the 30-day walkthrough. This is the window where adjustments are cheapest, and the one most homeowners forget. By the time the issue is obvious, it’s a repair, not an adjustment.
- Confusing a warranty claim with maintenance. If caulk separated because it was never resealed, that’s maintenance, not a guarantee issue. Know which is which before you call.
- Using the same reseal timeline as a national guide. Garland’s heat and clay soil push resealing to the shorter end of the range. Every year for wet areas and exterior caulk is the honest standard here.
- Sealing grout over damp or dirty joints. Sealant won’t bond to a wet or grimy surface, and it will fail within months. Clean, dry, then seal.
- Ignoring hairline cracks at the slab perimeter. In Garland’s clay soil, these often signal soil movement rather than installation failure. Watch and document rather than immediately patching.
- Not keeping a maintenance record. A simple note of when you resealed or re-caulked makes any future claim simple to resolve and protects the guarantee.
- Never checking under sinks and behind toilets. Slow leaks hide there for months. A two-minute check each season catches them before they do damage.
See the difference
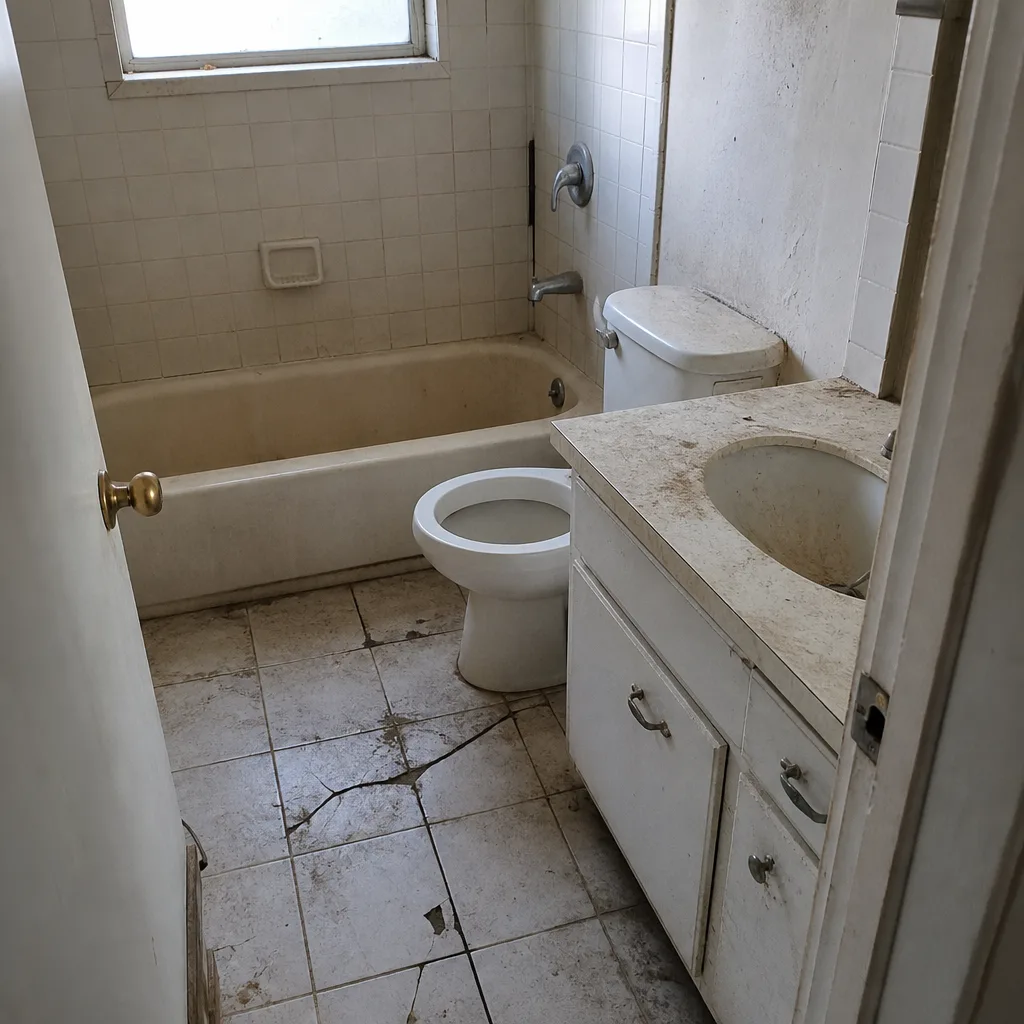 Before
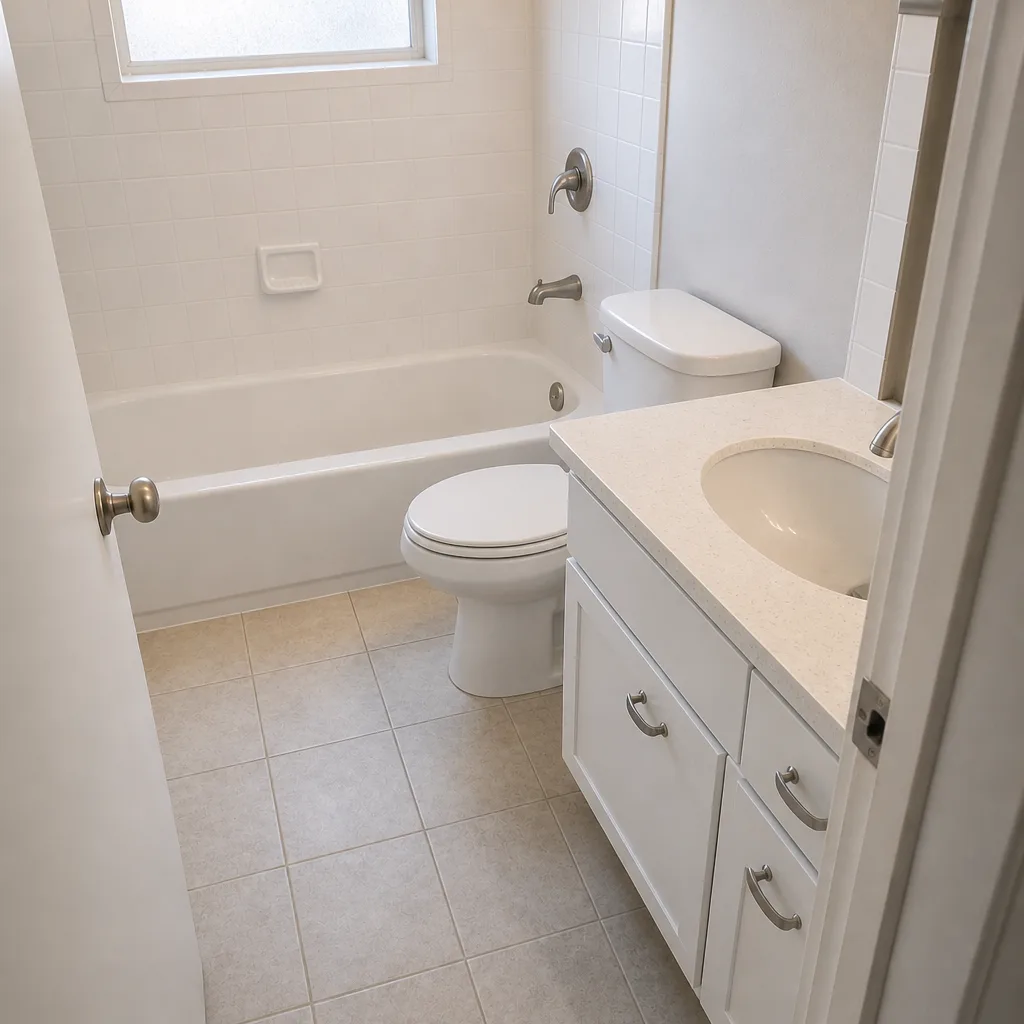 After
 Before
 After
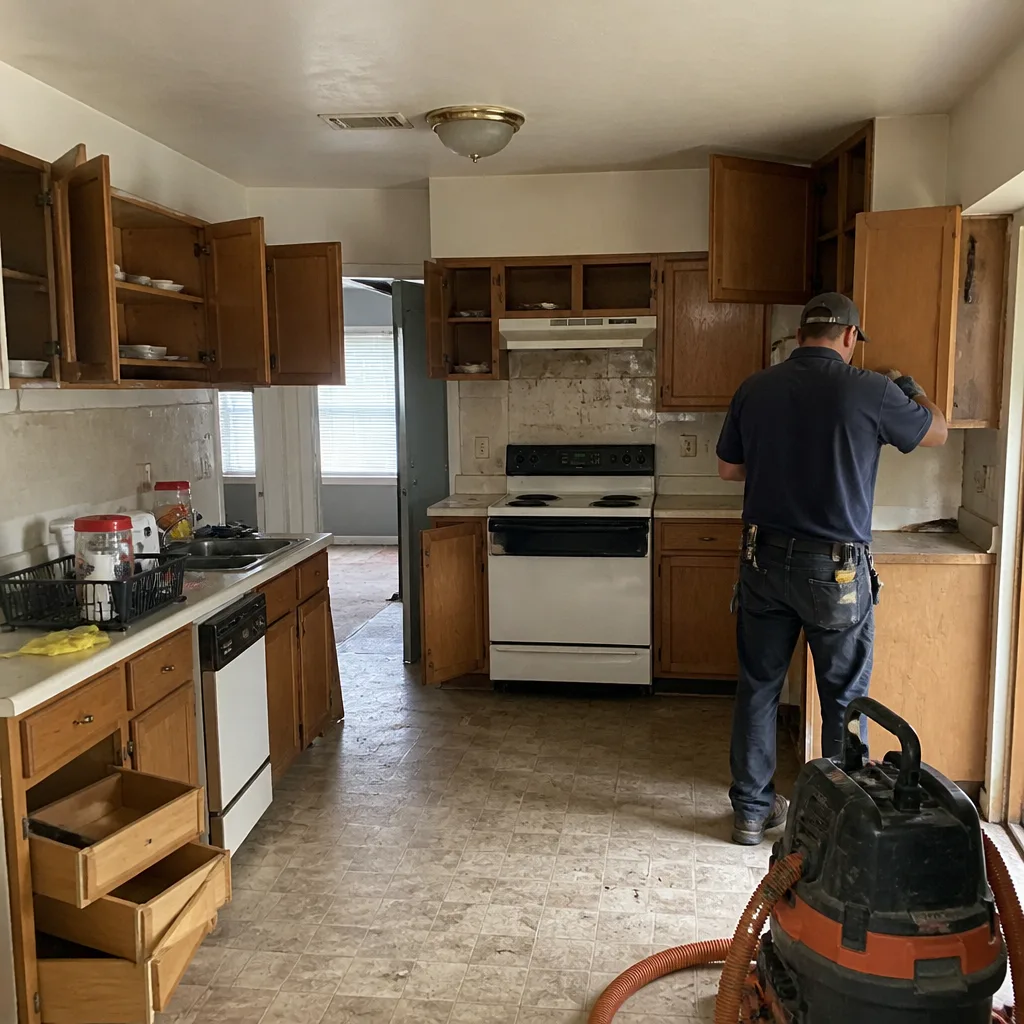 Before
 After
When to Call a Professional
Some maintenance is yours; some should go straight to a contractor. Call us when you see grout or caulk separating at the substrate, not just the surface, because that usually means moisture is getting behind the tile. Call when cabinet doors or drawers have lost alignment after the 90-day window, when a countertop seam has opened under normal use, when tile has lifted or cracked against a slab edge, or when a window seal has failed and you can see moisture between the panes. Those are defects or structural issues, not maintenance. We offer free estimates in Garland, and a live person answers the phone 24/7 at (844) 560-4146, so you can talk through what you’re seeing before you spend a dime. If the issue falls under our 365-Day Done Right Promise, the fix is on us.
Frequently Asked Questions

Your first full check should happen at 30 days, with a hardware and caulk adjustment at 90 days and a complete inspection at the one-year mark. The 30-day window is when settling is normal and adjustments are cheapest, so don’t let it slide. Call (844) 560-4146 for a free estimate if you’ve missed it and want a professional walkthrough.
The guarantee covers installation defects, like a cabinet door that warps, a drawer glide that fails, or tile that lifts because the substrate was set wrong. Maintenance covers wear and tear, like unsealed grout letting moisture behind tile. If you keep a simple maintenance record, it’s easy to tell which is which, and you’ll know exactly what to expect when you call.
Reseal grout in wet areas once a year and high-traffic floors every 12 to 18 months. Garland’s dry summers pull moisture from grout faster than in humid climates, and many tile manufacturers require annual sealing to keep their warranty valid. A quick water-droplet test tells you when it’s time. Call (844) 560-4146 for an exact quote on resealing or repair; estimates are free.
Yes, in many cases. Tile and grout warranties and cabinet hardware warranties typically require normal care and periodic sealing or adjustment, and skipping those tasks can void coverage. The same applies to window seals from manufacturers like CWS or ES Windows. Read the maintenance requirements when your project is complete and put them on your calendar.
Cracks in perimeter tile are often caused by expansive clay soil that swells when wet and shrinks when dry, not by bad installation. Garland’s soil moves more than most national guides account for, so tile against exterior walls is where you’ll see it first. Document the cracks and call a contractor if they widen or the tile lifts. Call (844) 560-4146 for a free estimate if you’re unsure.
Most of the schedule is homeowner work: the 30-day walkthrough, checking caulk and grout, and testing drains. Anything involving tile that has lifted, moisture behind a wall, or hardware that won’t stay aligned should go to a contractor, because those are signs of installation or structural issues. If you’re not sure which category you’re in, call (844) 560-4146 and we’ll tell you honestly.
The Bottom Line
A maintenance schedule is how you protect the money you already spent. The first 90 days are for catching small adjustments: hardware, caulk, drawer glides. The one-year mark is for grout and seal checks, and the seasons are for the systems the remodel sits on top of. Garland’s heat and clay soil push you to the shorter end of every reseal timeline, and knowing what your 365-Day Done Right Promise covers versus what maintenance handles keeps any repair simple to resolve. Print the schedule, keep a record, and call us at (844) 560-4146 for a free estimate when something needs a professional eye.
Written by the team at Penhallow Remodeling Garland.